
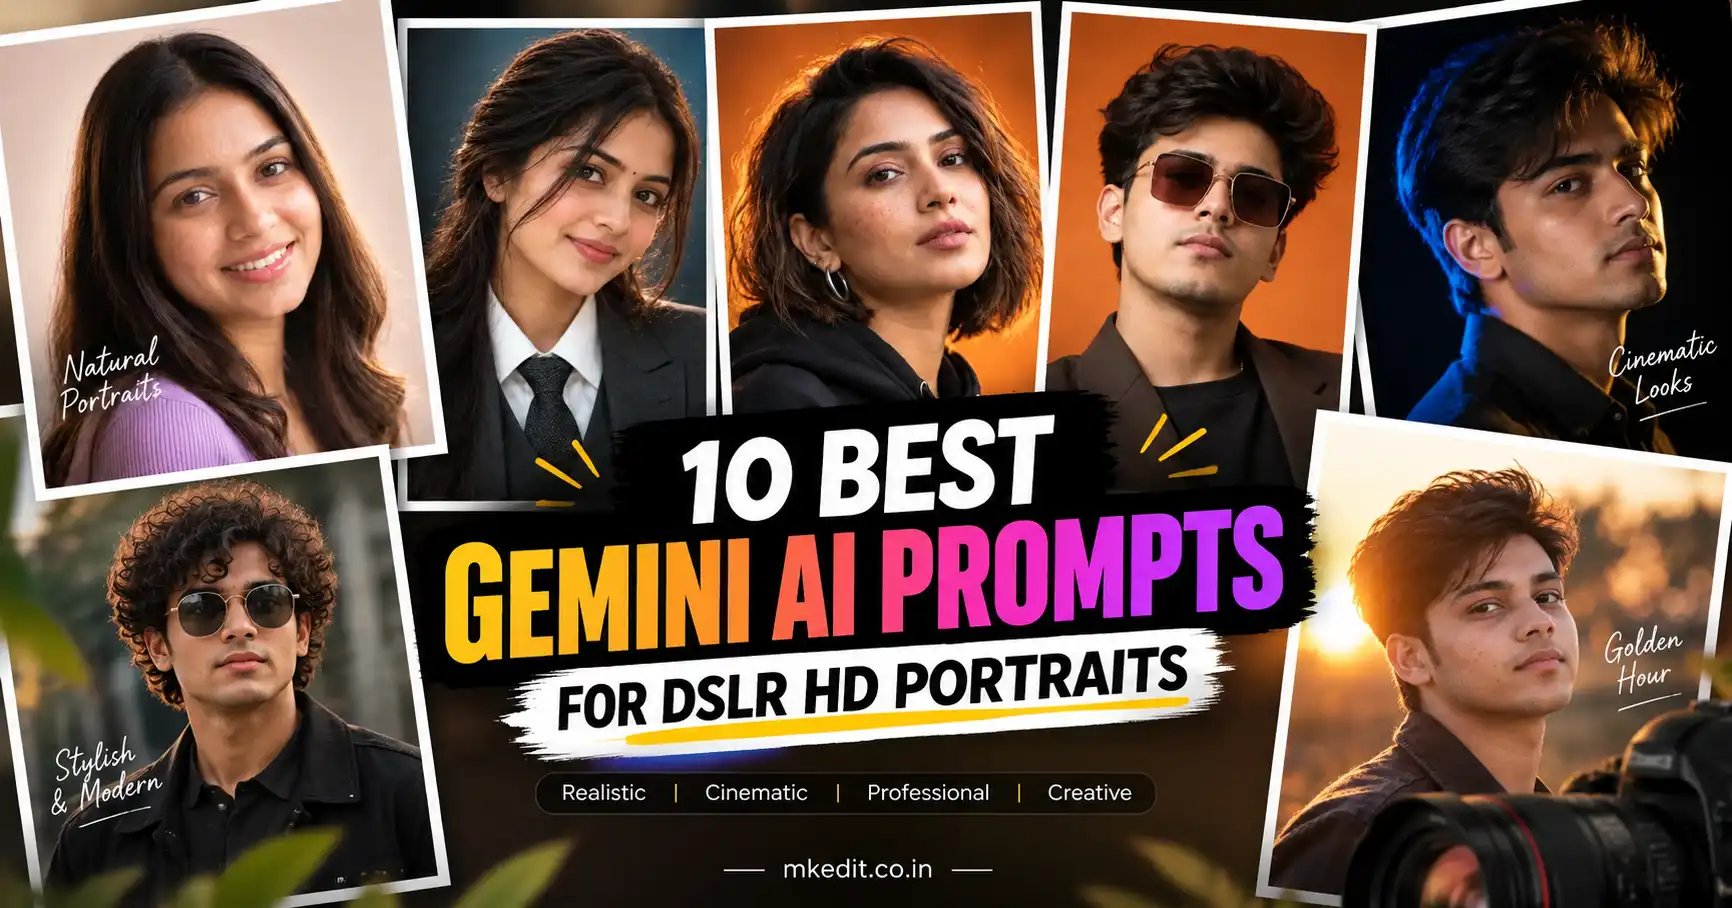
Most “AI portrait” prompts floating around the internet are just one lazy line — “make it look like a DSLR photo” — and that’s exactly why the results look flat and fake. A real DSLR portrait is built out of very specific decisions: which lens, which aperture, where the key light sits, how the rim light separates the subject from the background, what the skin texture should actually look like under that light. Gemini responds to that level of detail. The more precisely you describe the shot like an actual photographer would on set, the closer the output gets to something you’d see in a real editorial shoot.
I rebuilt these 10 prompts specifically to have that studio-grade, camera-brief structure — lens and aperture, lighting setup, background treatment, skin and identity notes, and clear negative constraints so Gemini doesn’t drift into that plastic, over-smoothed AI look. Upload a clear, well-lit reference photo along with any prompt below, and you’ll get a portrait with real depth, real light falloff, and real skin texture instead of a generic filter effect.
Here are 10 Gemini AI Prompts for DSLR HD Portraits
1. Neon Rim-Light Moody Portrait
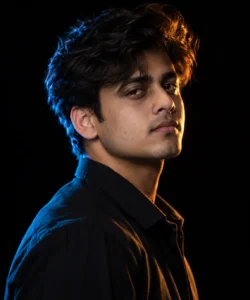
Create a cinematic, moody DSLR portrait of the subject against a pure pitch-black background, posed in a three-quarter turn with the face angled slightly away from the camera and a calm, confident expression. Preserve the exact face and identity from the reference photo — do not alter facial structure, skin tone, or proportions. Use dramatic dual rim lighting: a cool blue light striking one side of the hair, face, and shoulder, and a warm orange light striking the other, creating a sharp glowing outline while the front of the face stays mostly in soft shadow with just enough detail visible in the eyes and jaw. Shot on an 85mm portrait lens at f/1.8, shallow depth of field, high contrast, cinematic color grading, tack-sharp catchlights in both eyes, ultra-detailed photorealistic skin texture. No background elements, no watermark, no text, no extra limbs or distorted features.
2. Warm Studio Editorial Close-Up
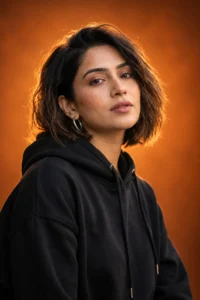
Generate a photorealistic close-up DSLR portrait shot from a slightly low angle, framed from mid-chest up, subject looking directly into the camera with a calm, composed expression. Keep the exact facial identity, hairline, and features from the reference photo unchanged. Background is a seamless burnt-orange studio backdrop with a soft gradient and gentle falloff toward the edges. Lighting setup: a warm key light placed behind and slightly above the subject to create a glowing hair rim light, paired with soft front fill light that sculpts the face without harsh shadows. Shallow depth of field with creamy bokeh, 85mm prime lens at f/1.8, warm cinematic color grading, smooth but realistic skin rendering with visible natural texture, sharp focus on the eyes. Clean, centered, minimal composition. No watermark, no over-retouched plastic skin.
3. Urban Street-Style Moody Portrait
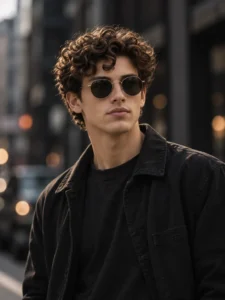
Recreate the subject as a cinematic, moody street-style DSLR portrait, medium close-up from chest up, head turned slightly to the side, eyes looking off-camera with a calm, confident expression. Preserve the exact facial identity, skin tone, and features from the reference — do not beautify or reshape the face. Background is an urban, dark, out-of-focus street setting with faint vertical structural lines suggesting buildings, softly blurred for a shallow depth-of-field effect. Lighting is soft and natural with gentle contrast, highlighting real hair texture, skin texture, and fabric detail without flattening it. Shot on an 85mm lens at eye level or slightly above, tight professional framing, cinematic desaturated color grading, documentary-editorial tone. Sharp focus on the subject, softly blurred background, no watermark, no distorted anatomy, no invented tattoos or accessories not present in the reference.
4. Regal Full-Body Throne Portrait
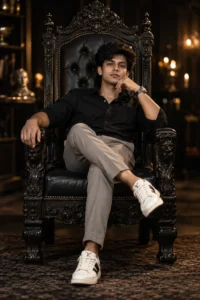
Create an ultra-realistic, cinematic full-body DSLR portrait of the subject seated regally in a large, ornate dark throne-like chair, leaning slightly back with one arm resting on the armrest and the other hand casually near the chin, legs crossed at the ankle in a relaxed, confident pose. Preserve the exact face, hairstyle, and identity from the reference photo with direct eye contact at the camera. Outfit should be sharp and well-fitted — a solid-color shirt, slim-fit trousers, and clean designer shoes — with visible fabric folds and realistic texture. Background is a dark, softly blurred bokeh setting that keeps the mood luxurious and cinematic. Full-body framing showing posture, legs, and shoes clearly. Dramatic directional lighting with rich shadow detail, ultra-detailed high-resolution rendering, realistic reflections on shoes and accessories. No watermark, no warped hands, no extra fingers.
5. Executive Luxury Studio Portrait
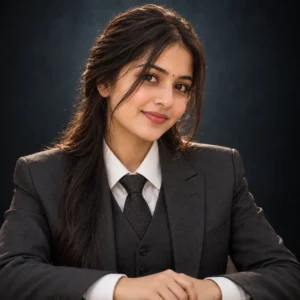
Using the uploaded photo strictly as a face and identity reference, preserve the subject’s recognizable identity with high fidelity — natural facial structure, skin tone, eye shape and color, nose, lips, jawline, and proportions. Do not beautify, reshape, or age the face, and do not invent glasses, jewelry, or facial hair not present in the reference. Create an ultra-realistic luxury studio executive portrait, photographed straight-on and centered, composed and confident with a calm, neutral expression and direct eye contact. Dress the subject in a tailored charcoal-gray three-piece suit with a crisp white shirt and dark textured tie, realistic seams and fabric weight. Background is a dark charcoal-black studio backdrop with a subtle cool blue-teal undertone, softly graded and out of focus. Use refined three-point studio lighting — soft key light above and in front, gentle fill, subtle rim light along the hair and jaw. Shot on an 85mm lens at f/5, tack-sharp eyes, natural skin micro-texture, no plastic skin, no beauty-filter smoothing, no CGI look, no watermark.
6. High-Fashion Editorial Sunglasses Portrait

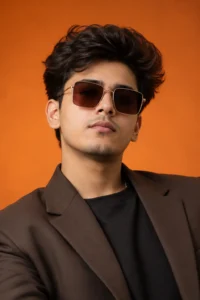
Generate a hyper-realistic high-fashion editorial DSLR portrait of the subject with voluminous, natural hair texture, wearing oversized square-framed sunglasses with a subtle tint that complements the backdrop color. Preserve the exact facial identity and bone structure from the reference. Outfit is a sharp, structured jacket or blazer layered over a simple top, with minimal, elegant jewelry. Background is a solid, vibrant studio color that pairs with the sunglasses tint, evenly lit with a soft gradient. Lighting is soft professional studio lighting with a clear key light and gentle fill, sharp focus on the face and glasses frame, shallow depth of field. Shot at 8K resolution, Vogue-style editorial color grading, confident, poised expression. No watermark, no distorted facial features, no extra accessories not described.
7. Golden Hour Cinematic Outdoor Portrait
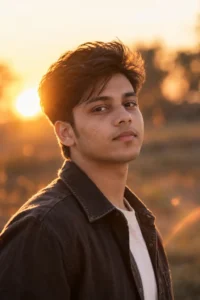
Recreate this portrait as a DSLR shot during golden hour, subject positioned so warm, low-angle sunlight hits the side of the face and hair, creating natural glow and a subtle lens flare at the frame’s edge. Preserve the exact facial identity and features from the reference. Background is an open outdoor setting thrown completely out of focus into warm, round bokeh shapes. Shot on an 85mm lens at f/1.4, hair catching natural backlight, skin showing real texture and warmth rather than an artificial glow. Cinematic color grading with warm amber and soft orange tones, shallow depth of field, sharp focus locked on the eyes. No watermark, no distortion, no extra fingers, no oversharpened skin.
8. Black and White Fine Art Portrait
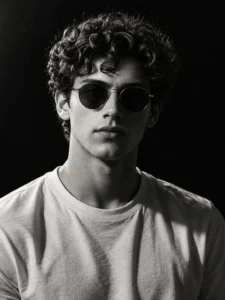
Convert this into a high-contrast black and white fine art DSLR portrait shot on a 90mm lens at f/2, preserving the subject’s exact facial identity and expression from the reference. Use dramatic side lighting — a single strong key light creating deep shadow on one side of the face and bright highlight on the other, classic sculpted studio lighting. Background fades smoothly into pure black with no visible detail. Skin should retain real texture and pore detail, not smoothed into a flat surface, with fine natural film-like grain across the image. Sharp, tack-focused eyes and eyelashes, rich tonal range from deep black to clean white, museum-quality print sharpness. No watermark, no color cast, no plastic skin finish.
9. Soft Glam Beauty Portrait
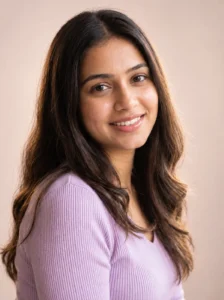

Create a soft glam beauty DSLR portrait shot on a 100mm macro lens at f/2.8, preserving the subject’s exact facial features and identity from the reference photo without reshaping or beautifying. Lighting setup uses a large soft key light directly in front and slightly above eye level for even, flattering illumination with minimal shadow, plus a subtle rim light to separate hair from the background. Background is a pale blush or ivory seamless backdrop with soft falloff. Skin should have a natural dewy finish with visible pores and highlight only on the high points of the cheekbones — not an airbrushed, waxy look. Sharp detail on eyelashes and iris, soft pastel color grading, ultra-HD clarity. No watermark, no over-smoothing, no distorted eyes.
10. Cinematic Rainy-Window Portrait
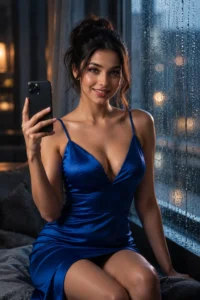
Recreate this portrait as a cinematic DSLR shot near a rain-streaked window, using a 50mm lens look at f/1.2 for shallow depth of field. Preserve the subject’s exact face and identity from the reference photo. Soft, diffused blue-grey light falls across the face, with faint raindrop shadows and soft reflections visible on the skin and background. Background is a moody, softly blurred interior with a hint of window light bleeding through. Skin should remain realistic with a slight cool undertone and visible natural texture, sharp focus locked on the eyes with a subtle catchlight, atmospheric depth, faint film-grain texture. No watermark, no artificial blur edges, no altered facial identity.
Notice the pattern across all ten — each one names a real lens and aperture, describes exactly where the light is coming from, and tells Gemini in plain terms to protect the person’s actual identity instead of “beautifying” it into a generic AI face. That combination is what separates a DSLR-quality result from a filtered selfie. Start with the prompt closest to the mood you want, swap in your own reference photo, and adjust only the wardrobe or background color line if needed — the lighting and lens language is doing most of the heavy lifting, so leave that part mostly as is for the best results.

Hi, I’m Deepak Verma. I run MKEdit because I got a little obsessed with how good AI photo prompts can look when they’re written properly and paired with the right AI tools to generate high-quality images. Everything you see here, I’ve generated and tested myself first. If it’s on the site, it’s because it actually gave a good result — not just a random idea I typed once